As a teacher or professor you want to use multimedia (e.g. from your school’s library) in your classes or for informal learning purposes, the trouble is how do you do that? If you have a documentary or a movie you made on history that you can distribute on mobile devices, you can deliver it to your learners in advance of a field trip. In that case it can be a great starting point for additional content that the learners produce. Of course you must always keep copyright restrictions and demand in the back of your mind and see to it that you distribute only with permission. Copying for your own personal back-up or viewing purposes is normally allowed.
During the last couple of months colleagues of mine (and family) have been asking to give them an easy way to rip and convert DVD movies to a format that works on their mobile device. This is how I do it, it is relatively simple and only costs 40 EUR, but if you want a broader approach, of if you want to search for specifics, the wikiHow on DVD ripping might be useful or go for the thorough and complete article of lifehacker on how to turn your pc into a DVD ripping monster (which also works for Mac’s and Linux computers).
The relatively simple (well, once you go through it, it will look simple) and easy way for windows operated computers (yes mom, this is the manual I promised to you, have fun), the examples are for a samsung omnia i8910:
If you are interested in adding subtitles to the movie for your mobile, look at this post.
Step 1. Get yourself a copy of AVS4You videoconverter and register it (it does cost you either 39 or 59 USD, but the latter gives you access to unlimited upgrades and other AVS software as well). This is a low cost software that is userfriendly and it covers a variety of formats (including High Definition).
Step 2. Download DVD43: this is a free DVD decrypter that runs in the background and decrypts DVDs on the fly. It enables easier decryption which means security of the DVD is more easily overcome. Remark: you do not always need this decrypter, but it enables a wider range of dvd’s to be ripped.
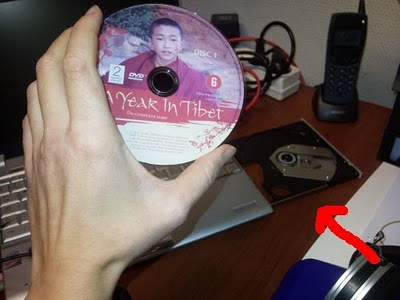
Step 3. Now the fun starts: get your DVD into the DVD reader. When a window pops open asking you want you want to do, do not select anything, just close it. Depending on the security features of the DVD the smiley face of DVD43 will either stay yellow or turn green. If it turns a smiley green, it means your DVD is being decrypted actively. Just let the smiley do what it wants to.
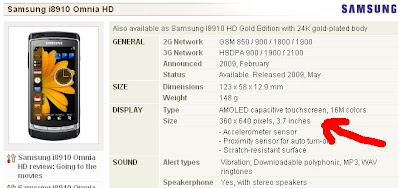
Step 4. Get the specifications of the screen of your mobile device (google the type of your mobile device and add ‘specifications’ or ‘specs’). Knowing what type of screen you have will allow the best possible format for your movies. So look for the specification: size of screen, display or similar.
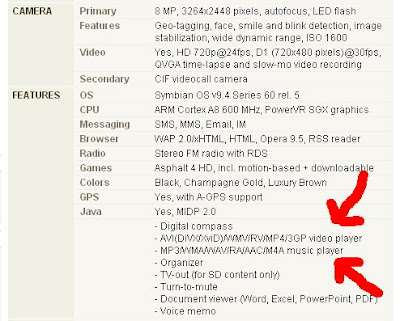
Step 5. Get the specifications of the audio and video files your mobile phone supports. There are various formats for audio and video, in order to convert the DVD to the right format for your mobile device, this is very important.
Step 6. Open AVS4you, browse to the file of your DVD on your computer. By default it looks at video files. You choose the 'video_ts.ifo' file. After the conversion is done, you can use the AVS4you converter 'edit' button to cut or paste to sections you want.
This part is important, but not necessary for the conversion to work. If you want to improve video viewing quality it is important to look at the bitrates and frame rate. For my phone I use around 350 kbps up to 500 kbps (depending on the lighting of the movie: a dark movie => higher bitrates, because it is more demanding on the eyes). This is not the most optimal setting for my screen (ideal would be 750 kbps), but it limits the file size. However, if I am planning to connect my mobile to a television set to share something (let’s say in a field clinic for training), then I use at least 1500 kbps for great viewing quality. But remember: the higher you make your bitrates, the more time it will cost your conversion program to convert to the format of your choice AND the bigger file size you will get. So trying to figure out what you need in order to have a comfortable viewing experience is a good thing.
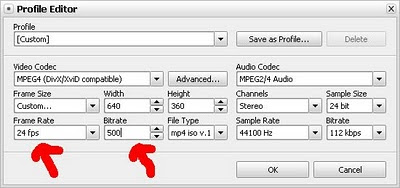
Important if you do not want speech to vary too much from the actual image (sometimes if you convert, a desynchronization can happen which makes your audio differ from the video. To avoid this from happening: Take the same rates as the movie. How? If you click on the 'advance button', you will see a list of features. To allow the best synchronization during the conversion of your file, the best thing to do is to adjust the output-rates with the input-rates (look at the red arrows in the first picture below).
Important! the details for the output-rates can be found in the 'advanced' section, but you must adjust the settings of the output-rates in the 'edit profile' section (see the second picture below).
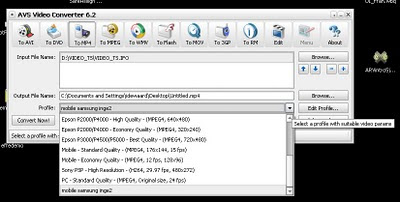
Step 8. Select a profile: this is important. Within the list of profiles you have some type of mobile devices are listed. If you have one of those profiles select it, if you are unclear about the profile select the most general one, e.g. 'convert to pda'.
Step 9. This step is optional. If you just want to keep it simple, go to step 10, otherwise: select the proper screen size for your conversion. You looked up your screen size earlier on. If you click on the option ‘edit profile’ and a window opens in which you can put your screen size. Do this to get an optimal conversion. In my case I put in 320 X 180 pixels. If you have selected your screen size, it is best to save the profile. This way you can just click on the profile for future conversions.
Step 10. Before pressing convert, make sure you type in the right output file path and add a recognizable title (this is something I forget to do a lot). After you checked it, press convert and the movie should be converted into the right format. The conversion rate is shown in the AVS4you window and once the conversion is completed you get a notification at it on the screen of your pc.
Now all that is left is to get the file you converted onto your mobile device. This depends on the type of synchronization you use between your computer and your mobile device (USB cable, Bluetooth, …).
If you have a problem with viewing the converted file, look at the format of the video again in the specifications of your mobile device and see if it is the same format.
Time-saving Tip: if you try this out for the first time, try it with a small test movie. That way it saves time (big movies, demand a lot of conversion time) and you will be able to look at the result much quicker.
Additional remark: sometimes the converted file is too big to get onto your phone memory. In that case you can convert piece by piece, this is how you could do it (you can also edit the converted movie into smaller movies). What if you want to convert piece by piece: open avs4you and go to the video-file setting. Change this so the browser depicts ‘all files’ (do this by clicking the arrow button next to the ‘files of type’ box. You will see a big list of files. Add them one by one by using the ‘+’ button (see image) Open all the VOB files, not the IFO-files. If you look at the details of those VOB-files, you will see big and small files. In most cases you can leave the small files and NOT include them in your conversion (those are intro files and such). The VOB-files do not necessarily correspond with the real chapters of the DVD, so make them follow one another (play list). The IFO-files do retain information on the DVD chapters, but if I try to copy from the IFO-files I sometimes do not get all the chapters automatically converted. That is why I sometimes start from the VOB-files. If there are a lot of VOB-files, I tend to convert them 2 by 2, this way my phone can open them more easily.
If any of you have a more simple way to convert all the VOBs at once into a playable file even when the files are really big, please let me know, thx in advance.
